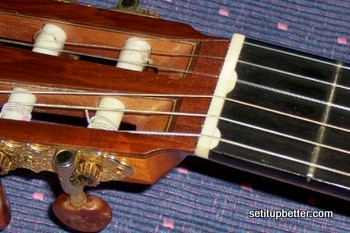
Case Study – Ibanez Hollowbody Electric Guitar
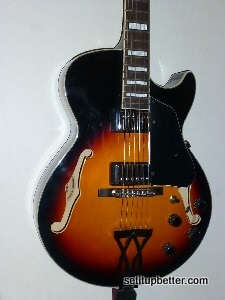 Ready for a little 20’s – 40’s swing? This will get me started! While usually Chinese made, this particular one is from Korea. The neck and fret board are very well done – couldn’t find any high or low frets, nor any other build problem! After slight adjustment of the truss rod and filing the nut slots, this guitar played perfectly.
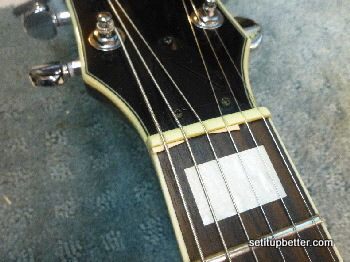 Here I want to make a point: A little adjustment can make a big difference; many players don’t bother! This inexpensive guitar, though perfect in many respects, had String action, over the first fret, wildly varying from .012 to .022″, not in string sequence. Adjusting from .011″ to .014 made it a dream to play (though the action could go lower still).
it still needed nut compensation, and I was not going to have time to do it for a couple months! Here is my temporary solution – toothpicks! First I measured the “cents off” on all the strings (using TB Strobe Tuner; I didn’t get my Peterson StroboPlus ’til a little later). The unwound 3rd was about 8.5 cents off, the 5th was 4, and the 6th was about 9; the rest were off less. Forcing round toothpick tips under the base of the 3rd and 6th strings actually corrected most of the intonation problem! And – they stayed in place!
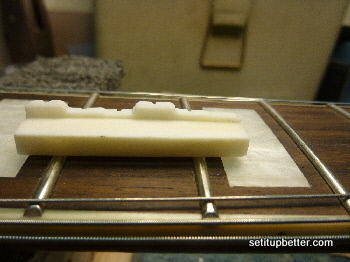
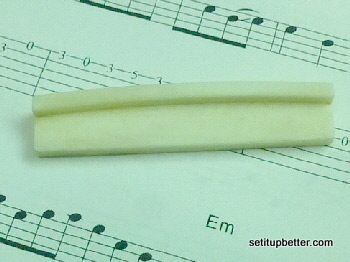 Eventually, I had developed the tooling for cutting a nut shelf, for the correct fret board radius, from an over-sized nut blank ( the one shown is similar). The rest of the work was done by hand.
After filing estimated offsets on the bench, I fitted the nut to the guitar and began detail adjustments, using pitch measurements.
I found the actual fret board radius was a little higher (smaller radius) than specified for the Ibanez. Perhaps this was due to hand work on the fret board after the initial machine shaping. I simply sanded the end of the fret board, along with the pearloid inlay, to fit the nut, blending it back about 3/4″, and then finishing with fine steel wool. There was a small amount of additional curvature at the edges of the fret board, which left a tiny gap between the fret board and the shelf. That was not a problem for me, because, the nut, being solid and strong, it is not essential to have the shelf in contact with the fret board, and neither was it a problem visually. I mention this because others may expect a similar experience with the radius fit on their guitar.
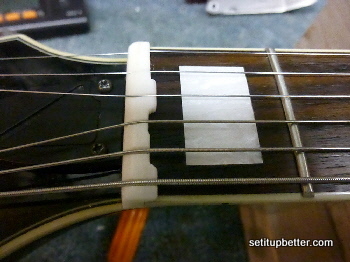
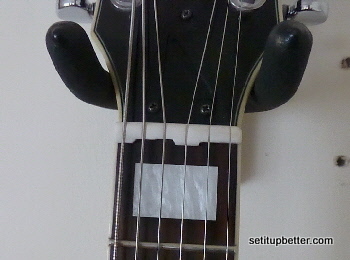
Here is the finished one-piece shelf nut!
Case Study – Webber Roundbody Guitar
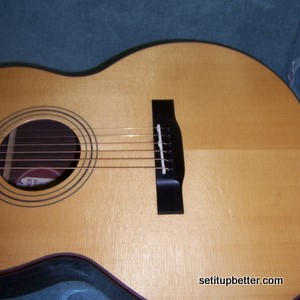 This is a guitar setup on a high-quality
handmade guitar built by David Webber, of North Vancouver BC. I was not in as much of a rush to work on
this guitar, because its intonation was much better than the most guitars. The guitar has a beautiful, full and
balanced sound.
The guitar was originally set up for medium strings; the new setup is with Martin light/medium strings: .0125–.055, exactly between lights and mediums.
he saddle is .122 thick (just under 1/8”). The strings rested on a ridge along the edge of the saddle, in a straight line, with no individual string compensation.
As I have mentioned, on acoustic guitars we tend to play a lot at the lower end of the fret board, so nut compensation is far more important than saddle compensation. But, we often tend to allow poor intonation on a saddle that’s too thin. Accomplished players deserve better when they are doing high leads, or swing players doing full closed chords typically up to the 10th fret or higher, etc.
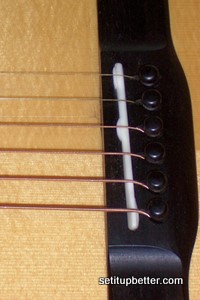 At this time, I decided to
do the full meal deal on the saddle. As
I do not have the means to cut a wider groove in the bridge (without destroying
the guitar) I decided to make a new saddle of the same thickness as the original,
and add bone material to accommodate the intonation needs, similar to adding shelf
material to the nut. It’s a shelf-saddle!
A problem with the original saddle was that the 1st and 3rd strings were overcompensated (they played flat by 4 cents and 8 cents, respectively, at the 14th fret) so material needed to be added to the new saddle, toward the nut. Another problem was that the 4th, 5th and 6th strings were under-compensated (played sharp by 3, 5.5, and 13.5 cents, respectively). There was plenty of material to compensate the 4th and 5th strings, but the 6th string needed to be faceted close to the back edge of the saddle. I added a piece of bone to the saddle to provide a smooth curve for the 6th string to follow, from the bridge pin up over the saddle, rather than a ski-jump with an abrupt edge.
It’s important to notice that, in this case, the need for more saddle thickness was not caused by compensation comparing fret 14 to fret 2, instead of open, or by compensating the nut. The nut compensation actually reduced the amount of adjustment needed at the saddle for the 1st, 3rd, and 6th strings!
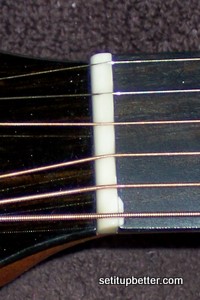 The nut was originally
positioned forward of the standard calculated position, sufficiently to
compensate the 2nd and 5th strings pretty well. That left the 6th string somewhat under-compensated, and the 1st, 3rd, and 4th
strings slightly over-compensated.
Compensation was accomplished, using the original nut, by adding a partial shelf for the 6th string, and faceting back at the 1st, 3rd, and 4th strings.
Doing this guitar setup was tedious, but the result was well worth it! The guitar really sings!
Most readers looking at these photos, and comparing them to their own acoustic guitars, will probably be amazed at how much compensation is needed to really achieve equal temperament! While almost all guitars show some amount of compensation measures, I think, especially for acoustic guitars, the usual standards are insufficient for serious players – the standards should be raised.
Case Study – Roberto Acha Geronimo Classical Guitar
 This guitar was built by Sr Geronimo for a contest in Paracho, Michoacan, Mx; it won third place. Lightly braced and slightly arched, it has a gorgeous, pleasing sound – and it’s quite loud! It has palo escrito sides and back, with Canadian cedar top. (It is being played here by an amigo in Melaque, Jal, Mx).
It sounds really great with the compensated nut. It was built with the nut slightly forward of design position, so the nut needed to be faceted back about .020″ (.5mm) at the 4th, and just a bit at the 5th. I was also able to improve the intonation at the saddle; I was able to facet the original saddle, and still have enough height. Action at the nut is .013″ – .018; at the 12th fret is .114 – .120″.
